
Python + Flask + Computer Vision + Firebase +Raspberry Pi + a pinch of HTML & CSS = Home Security System 😎
I always wanted to create a system which can exchange an expensive security system with monthly costs and I always wanted to use my Raspberry Pi for some useful tasks. This is why I ordered the cheapest webcamera from Ebay and started my Home Security Project.
About the project:
What I wanted to achieve is a simple security system which I can turn on and off from my phone, my laptop and I can authenticate myself so nobody can shut down the system while I am away from home.
If the system detects an intruder than it can take photos and notify me. And a really important thing: it not just takes photos, but it uploads the photos to a server so if the intruder would notice the camera and destroys the Pi than I still would have his/her face.
Modules I use:
- Flask – As I said I wanted something simple where I can login than start or stop the system. I think the best way to do this is a html site, and Flask is a simple choice (on this level…)
- Firebase – I just love it….Super easy authentication and I have a storage where I can upload my photos
- OpenCV – For the computer vision tasks. We detect the motion with this library
So these are the main libraries I use for this cool project
Computer Vision
This is not magic! We can say that the theory behind it is pretty simple.
Motion detection is what I use to identify if there is somebody in my home or not. I know that there are curtains which can move, and maybe pets, but a pet is (almost) always smaller than a human so we can create an algorithm which can only detect humans and big changes on the webcam feed frames. An interesting approach would be with Deep Learning but because I did not have a big dataset I can rely only on the Classic Image Processing methods.
When the detection starts, it stores the first image that the camera captures. Than I convert it to a grayscale picture, apply Histogram Equalization and Gaussian Blur. Than the camera always captures new images and I create a difference image between the current image and the stored one. Of course I apply the same gaussian blur and grayscale conversion to the new images too.
Here you can see the steps in an example:


gray -> equalized histogram -> blurred

previously stored image


difference image -> binary image
- Histogram equalization – This is useful if the image is too dark or too bright
- Gaussian blur – I use it for noise reduction
- Grayscale – It is easier and faster to work with 2D arrays and not 3D arrays
On the difference images I can find the contours and I can choose the largest one. With a very high probability that will be our unwanted human being. For that contour we can calculate the area and we can set a threshold value. So below that value it won’t be counted as a detection. That is only a “false”/unwanted detection. BUT….Above that value we can snap a picture and upload it to our Firebase project and notify ourselves because we just caught an intruder.
After we detected something we just store that frame, so we will have a new “background” image and we can detect new changes.
What happens if the night comes and the the light conditions change? It will detect as a change so as a movement in the pictures. That not good! 😦
I have excellent news! We can eliminate these kind of false alarms with refreshing the stored image. For example we can refresh it in every 5 seconds so only sudden light changes are bad for the system.
We can play with the contour area threshold value, Gaussian blur kernel size and the refresh time to create our reliable system which can eliminate the false alarms and noises and detect the real danger.
User interaction with the System
I don’t want to write a lot about the Flask + HTML + CSS part because I am a computer vision guy and I am not a big Flask master. 😀
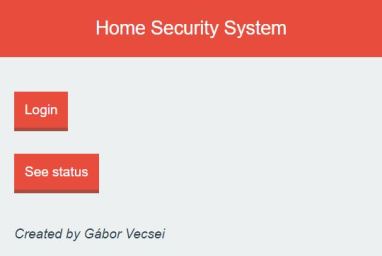
I made a simple homepage where I can see the current status of my detector and I can go to the login page where I can start/stop the whole system.
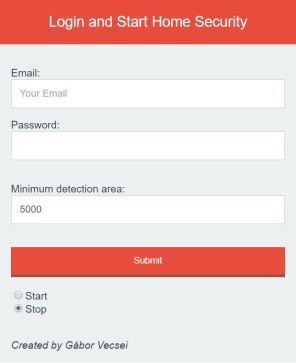
The login page is just a html form. With the data we provide on the form:
- Authenticate ourselves with the Firebase project authentication – if this was successful:
- Set the minimum detection area – This is the contour threshold I wrote about in the previous section
- Choose to start or stop the detection
This Flask application runs on the Raspberry Pi, so if we would like to see these pages we have to be connected to our local network and we have to know the IP of our Pi. Than if we navigate to: <rapberry_pi_ip_address>:5000 (because this app runs on port 5000) we can see the homepage. (Of course you can configure this as you would like to.) If you would like ,than you can make it public and buy a domain name so you can reach it where there is internet. Or just use ngrok. Infinite possibilities. 😀
I thought that a page like this is user friendly so anyone in the family can use it…even grandparents.
Code
You can find the github repo for this project here. If you have any suggestions, I would like to hear it!
Stay tuned for my the next cool project! 🙂

May 12, 2017 at 10:22 pm
This is a great project! I think it’s great that you show us how to use Flash for the web interface, but the idea of using Python to anaylze the images is really impressive!
LikeLike
May 13, 2017 at 10:25 am
Thank you very much!
LikeLiked by 1 person
March 2, 2024 at 6:00 am
Hey, Can you please share the resources to make this project live?
LikeLike